Wednesday, March 20, 2013

I can fix anything!!

Well, actually I can't fix anything, but my kids sure think I can.
If a toy breaks, they usually bring it to me to hot glue back together. There are several action figures at our house that are glued back together. :)
And if its clothes, they get set on my sewing machine to be fixed. The stuffed animals, or "friends" as my kids call them, they get fixed to. But it's more of an operating room scene there, with my kids holding them still so they can be fixed. 
Which brings me to my next item...the trampoline.
 
 
My sweet mother and father-in-law gave us their old trampoline last fall. We excitedly put it u and soon had to take it down because too many of the rings popped off. So to the garage it went in hopes that it didn't cost too much to repair. Earlier this spring, (I guess it's not technically spring until tomorrow) so earlier this month...the kids started inquiring about when I was going to fix them trampoline. I made a few phone calls and I couldn't believe it, $85-$105 just to fix the mat. Crazy!! 
So I set forth figuring out if I wanted to try it, and given the other option, I decided to try. I bought some leather needles, and some upholstery thread, and felt ready to try.
But because it's an older trampoline it gets everything pretty dirty, so I would have to try to get it all done at once so I could clean my machine really good, before I had anything else I needed to sew.  :)
Well, 4 hours, alot of frustration, and a really dirty machine later, it's done. And my kids couldn't be happier. Maybe I can fix anything....;)
 
Any crazy things your kids have asked you to fix??

Until next time...

Wednesday, March 13, 2013

The Magic is in the Details

Disneyland....Magical for every age.

I have not been to Disneyland since I was in high school, but as soon as I entered, I was surprised that the magic feeling was still there for me.
As I rode the many rides and met the many characters, I began to notice all the small details, for instant, the feel of all the rides are distinctively their own. Each ride makes you feel like you are there in that little story. 

And the costumes...WOW! 

Tinkerbell
Fawn
Alice and the Mad Hatter

Jedi Training show -Really Good if you haven't seen it!

Jedi Training show

Jedi Training show

Snow White
Tiana
I kind of wanted to wear the princess dresses! ;)

We rode the 'it's a small world' ride and I marvelled at the attention to detail on all those dolls clothing. Seriously there are hundreds of dolls on that ride alone, just over 300 to be exact, but each one is so unique and made with so much detail. More so than most people even notice, and why? It's part of the Magic. 
I actually made my family go on the ride several times, (which they didn't fuss about) just so I could try to capture some pictures of them. However, you will have to excuse my poor photography skills. Its hard to get detailed photographs while moving on a boat. :)

Those stripes are gold ribbon sewn on!!
So many cute ruffles!
It's really hard to see, but the dolls at the top have some major bead work.
Latin American Part

They are all beautiful, some have bead work or ribbon, others are ruffled, but my favorite was the ones in the Latin American part. It's also the ones I had the hardest time getting pictures of!!

I have so many ideas and inspirations floating around in my head just from that part! I loved it! So next time you are at Disneyland, hit up it's a small world and check out all the details!!  


Until next time....

Wednesday, March 6, 2013

Holiday Clothes

So maybe its just me, which it probably is, but I love making Lucy a little holiday outfit each month. Whether its revamping an old shirt or making her a new skirt, I love it!! And I try to make them so that she can wear them more than just at that holiday too!
 
 
At Christmas I made her this skirt with some left over holiday fabric from a different project. (I do admit this is kind of more of a seasonal one, but I already had the fabric. :)) 

 
For Valentines, I took one of her T-shirts that had a huge purple stain on it, and I just couldn't get it out. I simply added a giant heart. The cupcake skirt fabric we found on clearance. Together they are more Valentines-y, but if you separate the skirt and shirt I think she can where them year round. :)


Which brings me to St. Patrick's day. She already had the skirt I made a while back, I just took one of her plain white shirts and added a 4-leaf clover. And (BONUS) the clover is still low enough that she can wear it under a jumper and not have it show.  Oh and once again, if you separate them I think they can be worn year round, like add the skirt to her apple shirt a made a while back....
 
 
See, it doesn't scream St. Patrick's day!!
 
 
Oh I just wanted to give you a quick tip.... when you are making something and can't find thread to match well, the rule of thumb (I was always taught) is if it's a darker color, go with a darker thread, if it's a lighter color, go with a lighter thread. Or you can always accent with another color from the outfit, like I did. I used the darker green from the skirt to outline the clover. Well, that's about it!!
 
 
Until next time.....


Wednesday, February 27, 2013

Vacation....I think so!!

So exciting things are going on….we are going to be taking our first family vacation to….

Disneyland!!

I was a bit concerned just because I didn’t want to be waiting in lines forever, and we didn’t have a lot of $$$ to spend on it. We started looking and talking to friends and family. We got tons of helpful feedback from making sure to find out if your hotel has a parking fee or a resort fee, (neither of which they have to tell you about), to which rides to hit first for the least amount of time waiting in lines. Once we figured out what would be best for our family, we started to price out things, and WOW it gets expensive fast!!

We tried everything from booking through different places, and doing tickets to Disneyland and the hotel separately, to club membership deals, etc. We. Tried. It. All.

Luckily for us our kids brought home that Get Away Today magazine. We were able to book everything through them, and get the best deal, we know because we tried everywhere else!!


And then to make things even awesomer (no it’s not a word) they sent us a package that had a drawstring backpack for each of my (3) kids, 2 strivetoday bracelets (in cool test tube bottles), 2 lanyards, and coupons for each of us to downtown Disney retail stores, and an arena game card for each of us too! Oh and did I mention they were super friendily too!

So if you are looking to book a vacation, definitely check them out!! It was worth it for us!!


Until next time….


Wednesday, February 20, 2013

Embella Snaps

So back before the holidays, my sweet friend invited me to the Family Christmas Expo. I had never been, and it was definitely worth it!! One of the many wonderful things I saw there were these Embella Snaps. They are a great idea. It's like a magnetic snap. They hold really tight and they have tons of uses. I am getting ahead of myself though.....

I purchased the DYI Couture set which has enough to make 3 sets in each bag.


The kits comes with 6 washers, 3 snap tops, 3 snap bottoms, 6 hard 1" squares things, and 3 felt circles.
It also came with this little flier showing some of the things you can use them for.


I wanted to give it a try and put one on this headband, it took a minute to find the instructions on their website, but once I did, it was so easy!


And it held way more secure than I expected.


I did these shoes.


And I am definitely going to try some of these flowers I saw on their website. And wouldn't it be cute to add them to a dress. Then it would be soo easy to wash it and not worry about the flower getting ruined, you can just un-snap it, wash the dress, and then snap it back on! I love it, I can't wait. Put flowers on pillows, and still be able to change it. The possibilities are endless! :)


Look you can even put it on baby headbands!


I think I am going to try a few out of these cute little felt things and a bunch of other stuff too!
So go to their website, and check them out!!

BTW- these are all my own opinions. :)


Until next time.....

Wednesday, February 13, 2013

A 4-in-1 Craft

I know everyone has seen these cute 4-in-1 craft blocks everywhere. I just did them bigger!!

K. First of all I never plan to use or show things until I'm already started, or half way through a project. So just pretend I have pictures of the beginning...

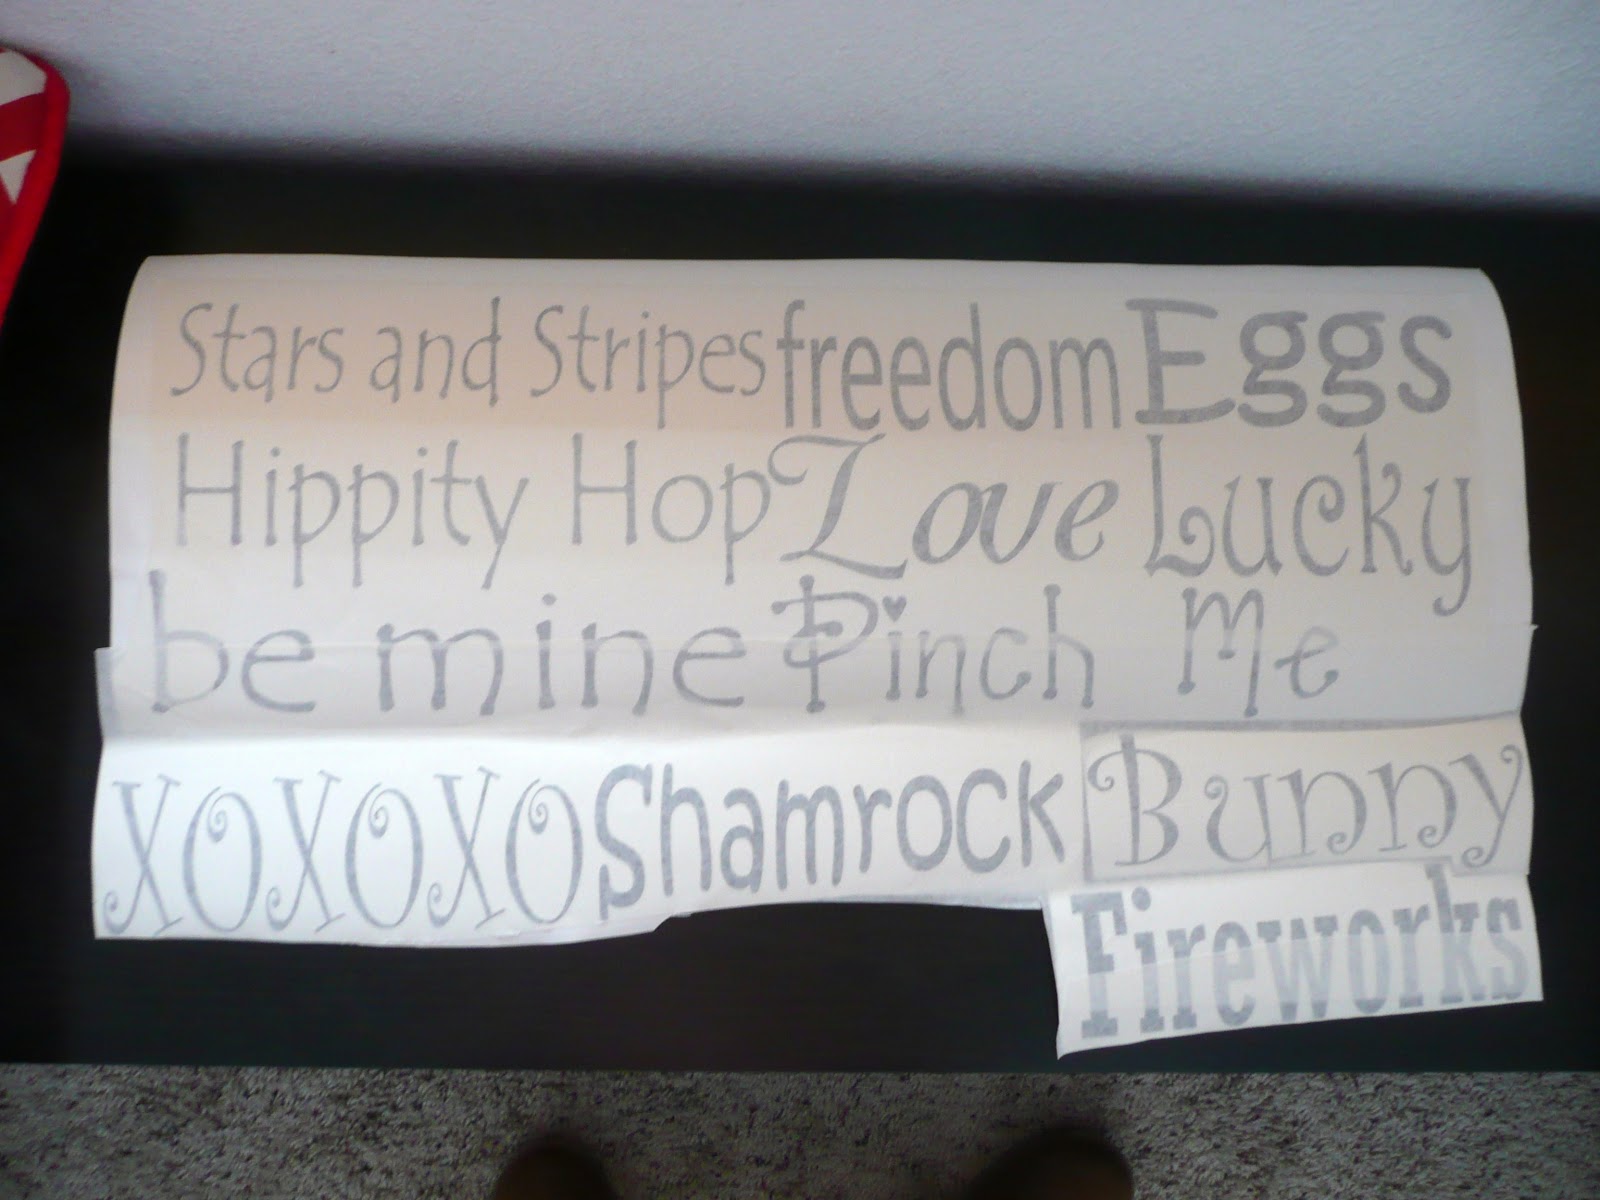
Here would be a picture of my supplies, 3 - 4"X4" blocks cut to 13", 11", and 9" long. Paper (12x12) to coordinate with the holidays you choose, 4 holidays, 3 patterns per holiday. I did Valentines, St. Patricks, Easter, and July 4th. (Tip: I used some pages that were double-sided so I didn't need as many pages.) Oh and don't forget the modge podge and...

 
...finally your vinyl words. I have a super sweet neighbor who cut my vinyl for me, but you can also go old school and cut it yourself. Using word, or corel figure out your words, and your font. Make them the size you want them. Mine were 2 1/2" tall and 6 1/2" for small block, 8 1/2" for medium block, and 10 1/2" for the large block. Then reverse the image and print. Trace it on the back side of your vinyl, and cut out each letter.
 
The words I used were...
Love                 Lucky               Eggs               Freedom
XOXOXO       Shamrock          Bunny              Fireworks
be mine            Pinch me       Hippity Hop      stars and stripes
 
 
K. Next paint your blocks the color of your choice. I choose white. Make sure you paint the ends too, since they will show. While the paint is drying cut your paper to size. I cut mine 3"x12" for the large block, 3"x 10 1/2" for the medium block, and 3"x8 1/2" for the small block.

 
Then modge podge the paper on. (tip: Modge podge the back of the paper, then place on the wood getting all the wrinkles out. Let dry, then apply modge podge on top of the paper. Let dry again.) Here's the blocks after the paper has been modge podged on.
 
And finally add your words.

 
July 4th
 
 
Valentine's

 
St. Patrick's Day

 
Easter
 
I know I am not the most crafty person, but I think they turned out pretty good, and I really like them. It was a simple project but I am able to use it for some of the holidays that I don't have lot of decorations for. In my book it's a win!!
 
 
Until next time....

Wednesday, February 6, 2013

A Dress to grow in....

Last summer my awesome cousin, (Thanks Deelisa!!) called me and told me to get down to a princess dress sale being held in a parking lot on state street. So I went and all of them were just $5.
 
 
So of course I bought three. What a deal. However in order to get them big enough for her not to grow out of them by the end of summer I had to get the large size which was also about 10 inches too long for her. And since she grows like a weed I didn't want to chop them off and have them be too short by next summer. (I had already fixed the blue on in this picture, but lucky for you I'm lazy and haven't fixed the white one so you can see how long it is. ;) )
Here's what I did....

 
First I measured how wide around the dress was and it divided evenly into 6 so I would have 2 gathers in front and back and 1 on each side. (Perfect.) Then I measured how much it had to come up...10 inches, then  added 3 inches because it was going to swoop down and I didn't want that dragging. So my number was 13 inches. I measured and drew a line then pinned the sheer overlay to the underlining. 

 
Then I sewed 2 lines 1/4" apart with a gathering stitch. I DID back stitch at the beginning. (I started my stitch at where the overlay started.) And please don't mind how crooked the lines are, I had a little girl sitting on my lap "helping". :)

 
Then I simply pulled my threads and tied off the ends.  Then just because it would probably be a while until I needed to lengthen it again and I didn't want them to come undone, I sewed in the center of the 2 gathered lines with a normal stitch. Just to be safe it didn't come undone. Sorry no picture.
 
 
Here's what it looked like when I finished with that. But it still needed something...
 
 
So I simply tacked bows at the top of each gather. You can even just safety pin them on too.

 
It added just what I wanted.

 
So here is the finished dress. But how did she like it....

 
She loved it.

 
Now she is "perfectly ready" (in her words) for her friends Sophia Princess party next week. :)
 
 
Until next time....